Your listing photos do the heaviest lifting of any single element in your shop. A buyer scrolling search results sees your photo before they see your title, before they see your price, before they see a single review. If the photo doesn’t earn the tap, nothing else has a chance to.
Here’s the good news: you don’t need a DSLR, a softbox, or a $400 light kit to take photos that compete. A modern phone, a window, and a piece of white poster board are enough — if you set them up correctly. This guide walks through the entire setup, the five-photo formula every listing should follow, and the editing rules that turn a decent photo into one that converts.
Why Listing Photos Decide Whether You Sell
Phone product photography is the practice of using only a smartphone — no DSLR, no studio kit — to shoot listing-ready photos for an online shop. Modern phones produce images that hold their own against mid-range mirrorless cameras for marketplace listings. The gap between hobby photos and professional listings is now a gap of technique, not gear.
A buyer’s first decision is binary: tap or scroll. They make it in a fraction of a second, before they read your title or notice your price. That decision is driven almost entirely by the thumbnail image. A great photo with a mediocre title still wins clicks. A bad photo with a perfect title loses every time.
Once they tap in, your photos keep working — answering questions, showing scale, building trust. Most shoppers cycle through several images before they make up their mind, which means every photo in your listing has a job to do.
This is why investing time in photography returns more than almost anything else you can do for your shop. Better photos lift click-through, lift conversion, and let you charge more for the same product.
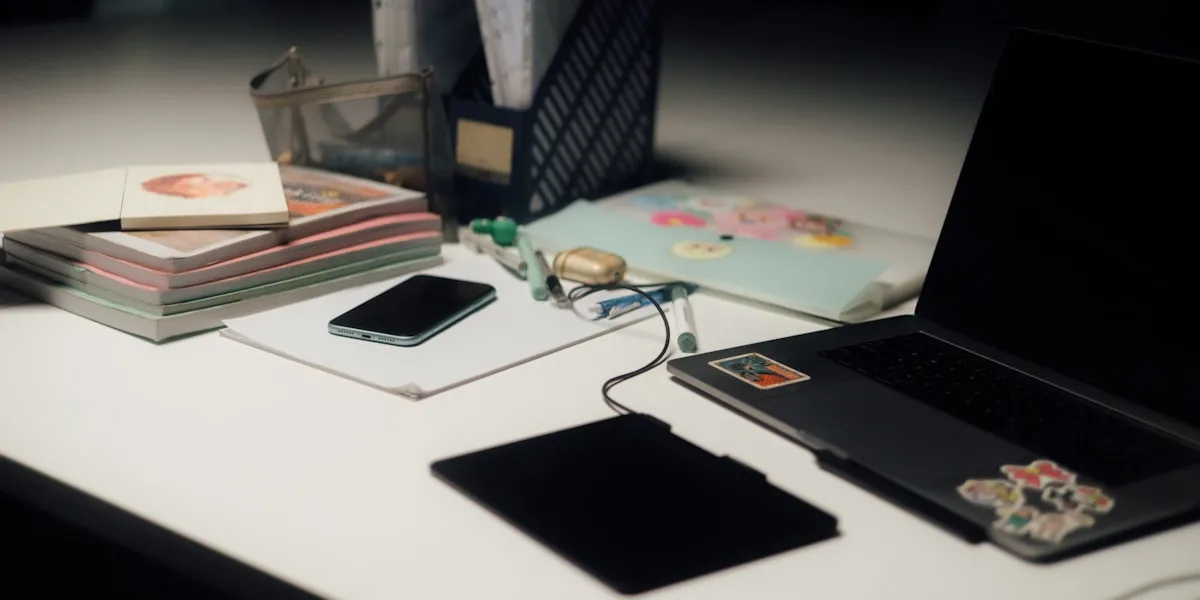
What You Need (and What You Don’t)
The full kit for phone product photography:
- A modern phone. Anything from the last four or five years works. iPhone 12 or newer, Samsung Galaxy S21 or newer, a recent Google Pixel — all take listing-ready photos with the default camera app.
- A window with indirect natural light. North-facing is ideal (no direct sun), but any window with a sheer curtain works.
- A large piece of white poster board. Get the kind that bends. You’ll use it both as a backdrop and as a light reflector. A few dollars at any office supply store.
- A microfiber cloth. Clean the lens before every shoot. Pocket lint and fingerprints ruin more product photos than bad lighting.
- Optional: a $15 phone tripod. Stops camera shake and gives you consistent framing across a batch of listings.
What you don’t need: a DSLR, a softbox, a lightbox, “studio lights,” a macro lens, or any photo-editing software that costs money. Every step in this guide works with what’s already on your phone.
Step 1: Set Up the Light
Place your product perpendicular to a window, with the window on your left or right — never behind the camera, never behind the product.
Light direction is the single biggest variable in product photography. Get this right and almost everything else forgives you.
The rule: side light at roughly 90 degrees. Window on the side, product in the middle, you (and the phone) opposite the window.
Why side light works. It creates dimension. A product lit from the front looks flat and lifeless. A product lit from the side has subtle shadow that shows texture, depth, and shape. Buyers feel the product instead of seeing a sticker.
What to avoid:
- Direct sun. Harsh shadows and blown-out highlights. Wait for clouds or move to a shaded window.
- Mixed light. A window plus an overhead bulb creates a yellow-blue color cast that’s hard to fix in editing.
- Backlight. Silhouettes your product unless that’s the look you want.
- Phone flash. Never. The flash is for selfies at midnight, not products.
Best times of day. 10 AM to 3 PM on an overcast day is ideal — soft, diffused, no harsh shadows. On a sunny day, find a window with a sheer curtain or a wall that bounces light indirectly.
The fill-light trick. Place a second piece of white poster board opposite the window. It bounces some light back into the shadow side of your product, opening up details that would otherwise disappear. This is the closest thing to a free studio setup that exists.
Step 2: Choose Your Background
Match the background to the product’s vibe — white for clean and modern, wood for warm and rustic, fabric for soft and textured. Pick three and rotate.
Most sellers default to a single background and use it for every listing. That’s fine, but a three-background system gives variety without losing the consistency that builds shop identity.
| Product type | Best background | Why |
|---|---|---|
| Jewelry, soaps, candles, ceramics | White poster board or marble tile | Lets fine detail and color read clean |
| Textiles, knitwear, paper goods | Linen fabric or natural wood | Warm tones, subtle texture, story-driven |
| Bold-color products | Solid neutral (gray, beige) | Keeps the product the star |
| Food, baked goods | Wood board or parchment paper | Reads as “made with care” |
The biggest background mistakes are busy patterns and inconsistency. A patterned tablecloth, a quilted bedspread, or your kitchen counter with crumbs all compete with your product — the buyer’s eye doesn’t know where to land, so it lands on the next listing. And inconsistent backgrounds across listings make a buyer feel like they’re walking through five different shops instead of one.
Pick two or three backgrounds and stick with them. That’s the system.
Step 3: Lock Down the Camera Settings
Turn on the grid, use the main 1x lens, tap to focus, lock exposure, and turn off Live Photo.
Phone cameras try to be helpful. Most of the time they are. For product photography, you want to override their defaults.
Settings to change before your first shoot:
- Grid: on. Settings → Camera → Grid (iPhone) or Settings → Camera → Grid lines (Android). The 3×3 grid helps you center the product and apply rule-of-thirds composition.
- Live Photo: off. Adds nothing for stills, eats storage, sometimes confuses the shutter.
- HDR: auto. Lets the phone preserve detail in both bright and dark areas. Don’t force it on or off.
- Format: JPEG, not HEIC. Many listing platforms still don’t handle HEIC well. Settings → Camera → Formats → Most Compatible (iPhone).
In-shoot moves:
- Use the 1x main lens. Not the 2x telephoto or the 0.5x ultra-wide. The main lens has the largest sensor and the best optics. Telephoto looks tempting but adds noise in indoor light.
- Avoid pinch-to-zoom. That’s digital zoom — it crops the image and degrades quality. Move yourself closer instead.
- Tap the product to focus. Then hold the tap for one to two seconds until you see “AE/AF Lock” on iPhone (or a similar lock indicator on Android). This freezes focus and exposure so they don’t drift between shots.
- Slide exposure down. After locking, drag the little sun icon down 10 to 20 percent. Phone cameras over-brighten white backgrounds to “fix” them, which dims your product. Manually pulling exposure down keeps whites clean and product details visible.
Step 4: The 5-Photo Formula
Every listing should have at least five photos in this order: hero, detail, in-context, scale, and group.
Most listing platforms let you upload eight to ten photos. Sellers who post one or two leave conversions on the table. Sellers who post ten random angles confuse buyers. The right number is five purposeful shots, and each one should answer a different question.
| # | Shot type | What it answers | Setup |
|---|---|---|---|
| 1 | Hero | ”What is this?” | Clean, centered, on your white background. Product fills 60–80% of the frame. This is your thumbnail. |
| 2 | Detail | ”What is it made of?” | Close-up of texture, stitching, finish, or material. Get within a foot of the product. |
| 3 | In-context | ”How is this used?” | Product in real use — worn, held, on a table, in a kitchen. Builds desire. |
| 4 | Scale | ”How big is it?” | Product next to a known reference: a hand, a coffee cup, a ruler, or a common item. |
| 5 | Group / variation | ”What are my options?” | Multiple angles, color variations, or accessories included. Shows the full offer. |
The hero is non-negotiable. It’s the only photo most shoppers see in search results. Spend the most time on this one and re-shoot it if it’s not strong.
If you have room for more, add a back-side shot (clothing, stationery), a packaging shot (gift-giving confidence), or a styled lifestyle shot. But the first five do the heavy lifting.
Step 5: Edit Without Overdoing It
Brighten, balance whites, lift shadows, crop square. Don’t touch saturation.
Editing is where most sellers either skip a step or go too far. The goal is to make the photo look like the product looked when it was sitting on your table — not better, not worse.
Free tools that work:
- Your phone’s built-in Photos editor (everything you need is here)
- Lightroom Mobile (free, more control, syncs across devices)
- Snapseed (free, made by Google, good for selective edits)
The three-slider workflow:
- Exposure (+10 to +30). Brighten until whites in your photo look white, not gray. If your “white” reads as light gray, push exposure up until it pops.
- Whites slider (+15 to +25). Pulls only the brightest tones up. Whites snap clean without overcooking the rest of the image.
- Shadows (+15 to +25). Recovers detail in the dark side of your product. Don’t push past +30 — the image starts to look fake.
What not to do:
- Don’t increase saturation. Your buyer will receive the real product, not the photo. Oversaturated photos lead to “color was different than pictured” reviews.
- Don’t use Instagram-style filters. Vintage, fade, cool, warm — none of them help a listing photo. They make products look filtered, which buyers read as “what’s wrong with the real thing?”
- Don’t add watermarks. Most platforms strip them, and they look amateur when they survive.
- Don’t sharpen heavily. A little (+5 to +10) is fine. Heavy sharpening creates halos around edges that scream “edited.”
Crop: 1:1 (square) is the safest aspect ratio for marketplace listings. Most platforms display thumbnails as squares — crop yours that way so you control how they appear.
Export: Save at full resolution. Don’t email the photo to yourself (compresses it) or screenshot the edit (loses quality). Use AirDrop, Google Drive, or save directly to your camera roll at original quality.
Common Mistakes That Quietly Kill Listings
A field guide to the photo problems that lose sales without you noticing:
| Mistake | What it signals to buyers | Fix |
|---|---|---|
| Flash on | ”Amateur, rushed” | Always use natural light |
| Cluttered background | ”I don’t know what I’m selling” | Pick 2–3 clean backgrounds and stick with them |
| Mixed light sources | ”Color may not be accurate” | Turn off artificial lights, use only window |
| Only one photo | ”Hiding something” | Use the 5-photo formula |
| Inconsistent style across listings | ”5 different shops” | Standardize backgrounds, angles, and editing |
| Heavy filters | ”What does it actually look like?” | Edit minimally |
| Tiny product in frame | ”Not confident in the product” | Fill 60–80% of the frame |
| Watermark over product | ”Hiding something, trying too hard” | Skip the watermark |
| Blurry main shot | ”Doesn’t care about the listing” | Use a tripod or brace elbows on a table |
Phone Product Photography Cheat Sheet
For when you need a refresher in the moment:
- Light: Side window, 90 degrees from camera. No flash. No mixed light.
- Background: 2–3 clean options. Pick one per shoot.
- Lens: Main 1x. Walk closer, don’t zoom.
- Focus + exposure: Tap product, hold to lock, drag exposure down 10–20%.
- Composition: Product fills 60–80% of frame. Grid on. Rule of thirds for in-context shots.
- Edit: Exposure up, whites up, shadows up, saturation untouched.
- Output: 1:1 crop, full-resolution export.
Print this and tape it next to your shoot spot. It’s the difference between consistent listings and “I’ll figure it out next time.”
Track What’s Actually Working
After you’ve reshot a batch of listings with this system, the next move is to figure out which photos actually moved the needle. Look at views and conversion rates seven to fourteen days after the swap. The lifts will surprise you — sometimes a single re-shoot revives a listing that had been quiet for months.
Keep a simple log of which listings you’ve updated, what you changed (background, angle, lighting), and what happened in the numbers afterward. This is the difference between sellers who improve and sellers who keep guessing.
A tool like the Etsy Product Tool tracks listings and competitor data in one place, so you can see which products you’ve refreshed and what changed afterward. If you want broader visibility — pricing, profit margins, SEO scoring, and product management bundled together — the Etsy Seller Toolkit wraps six tools into one workbook.
Photos drive the click. The Etsy SEO Tool makes sure the right buyers see them in the first place — keyword scoring, title and tag validation, and competitive analysis so your photos aren’t doing all the work alone. (For a deeper look at the search side of the equation, see how marketplace SEO actually works.)
When You Outgrow the Spreadsheet
If your shop grows past 50 to 100 active listings, tracking photo updates, inventory, and product performance in a workbook starts to crack. You’ll find yourself opening five tabs to answer one question. That’s the signal to graduate.
And when your business outgrows a spreadsheet… Ardent Seller is the next step. Full inventory, manufacturing, and sales management for makers who’ve moved past spreadsheets but aren’t ready for enterprise software — it connects the dots between what you photograph, what you list, what you sell, and what you have left.
The Bottom Line
Phone product photography isn’t about gear. It’s about light, framing, and a five-shot system you can repeat across every listing without thinking. Set up the window. Clean the lens. Tap, lock, expose down. Hero, detail, context, scale, group. Edit lightly. Ship.
Pick one product and do this today. Compare the new photos to the old ones side by side. The lift is usually obvious enough that you’ll want to redo the rest of your shop that same week — which is the entire point.